
Air Morse is a device that decodes Morse code puffed into a tube and displays the results on an LCD display. It is small and battery powered. It is designed to allow anyone that can puff pressure into a tube to communicate.
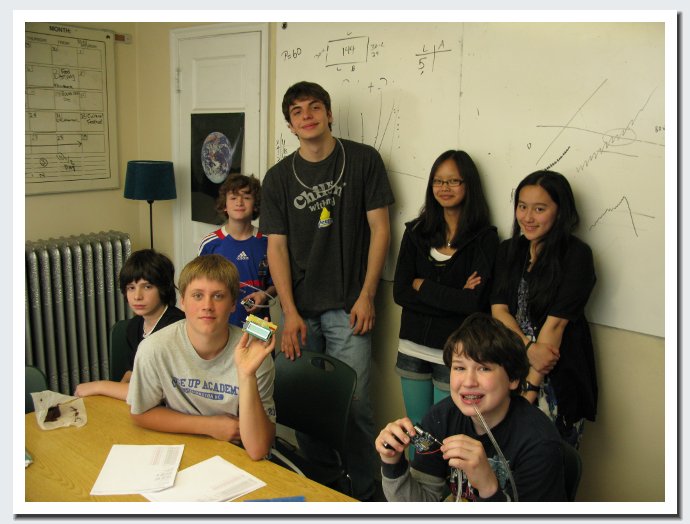
This project was designed and programmed as part of the Alcuin Montessori School Adolescent Program course Introduction to Computer Programming in Oak Park, Illinois. The seven students worked with the Arduino single board computer, learning to control LED lights, read analog signals like pressure, write to LCD displays, and finally put all of these together to create the Air Morse device.
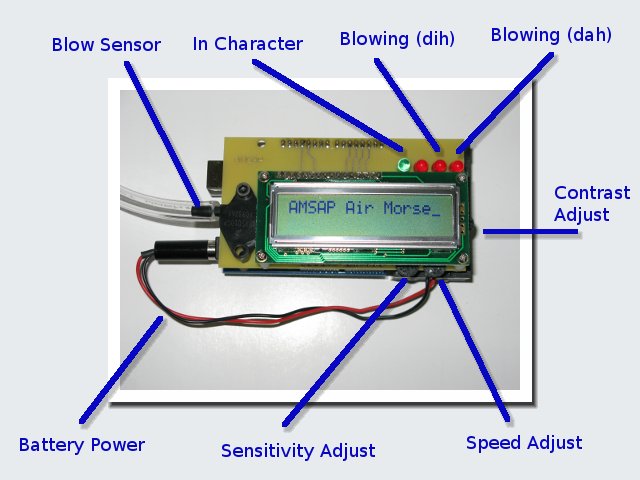
The user puts one end of the tube in his/her mouth, and both the user and the person he/she is talking to watch the display. The application of a slight pressure, by blowing or even just squeezing a cheek, starts a character. Immediately, the green light comes on to show that a character is in process, and the center red light comes on to show that if the user stops blowing now this will be a Dih (.) element. If the user continues to blow long enough, all three red lights come on to show this will now be a Dah (-) element. When the user stops blowing, all red lights go off, but the green light stays on to show that the device is still building a character and more Dih or Dah elements can be added. If the user stops blowing long enough, the character build procedure comes to an end, the elements are interpreted as a Morse code character which is displayed, and the green light goes off to show the end of a character.
The use of the system is demonstrated in this video:
The Air Morse is built upon the Arduino single board computer. Based upon an Atmel AVR processor, the board brings out to headers a variety of digital and analog inputs and outputs.
The Arduino is programmed in C using an integrated development environment based on the Wiring environment (which in turn is based on Processing). This programming environment runs on a variety of operating systems.
The components were originally interfaced and tested using a solderless breadboard. As the project solidified, a printed circuit board called a shield was made to make the wiring easier and more robust. You can look at the schematic, an expanded view of the circuit board, or download the CAD/CAM files for the schematic and board layout used to make the boards. These files can be edited using the freeware Eagle Light program from CadSoft.
The pressure is detected by an MPX5010 pressure sensor from Freescale Semiconductor. This device takes in pressure from 0 to 1.45 psi, and puts out a linear proportional signal from 0 to 5 volts, which is wired to analog input 0 on the Arduino.
A 10 kOhm trimpot is wired to analog input 1. This is used to set what pressure is required to start a character. If this is too low it is easy to accidentally insert Dihs when you don't want them. If this is too high, you have to do too much work blowing.
Another 10 kOhm trimpot is wired to analog input 2. This is used to set a time scale for the difference between Dihs and Dahs, and the amount of quiet time required to end a character. This needs to be set to match a comfortable speed for the user.
A third trimpot is wired directly to the LCD to control the contrast. This is adjusted until the display looks clearest.
The LCD display from Lumex is one of a class of similar devices, and is supported by a library in the Arduino environment.
The program was written by the students in three teams:
Team Display (Jacob and Madeleine) wrote the routines that configured and lit up the LEDs, initialized the LCD, and wrote characters to the display, moving between the two lines and clearing as required.
Team Decode (Nick, Tim, and John) wrote the function that returns a character from a string of Dihs (.) and Dahs (-).
Team Detect (Sarah and Jonah) wrote the finite state machine that looks for when the user starts and stops blowing, building a string of Dihs and Dahs. This code calls the functions provided by the other two teams as required.
Some history of the use of Morse code as an enabling technology can be found here, here, and here.
A device that works as a Morse code interface to computers can be found here. The same site has a lot of background information.
Another site with a wealth of hardware and software solutions is here.